Part 3: Collaborative Development with Git and GitHub
Git and GitHub are powerful tools for collaboration. They ensure you can track changes, work in parallel, and avoid overwriting each other’s modifications. In this workshop we will practice the basic routines. For a deeper understanding, check out tutorials on YouTube or other learning resources online.
Branching and Pull Requests
It is best practice to create your own branch for any modification you make.
This branch serves as a safe workspace for your changes. Once you are satisfied, you can commit the changes and open a pull request (PR) to merge them back into the main branch.
- Branches let you work independently without breaking
main - Commits record your changes step by step
- Pull requests (PRs) allow you to merge your changes after review
- Branch protection rules can be set in GitHub (e.g., require review before merging into
main)
You can perform all these tasks via the terminal or the GUI in VS Code. It is useful to know both approaches.
GitHub Authentication
Before we can push any code changes to GitHub, we need to make sure each participant is authenticated.
This step is mandatory — otherwise git push will fail.
Step 1: Check if Authentication Already Works
In your cloned repository, run:
- If the URL starts with
git@github.com:...→ you are set up for SSH. - If it starts with
https://github.com/...→ you are using HTTPS.
Try pushing a test change:
- ✅ If it pushes without asking for credentials → authentication works.
- ❌ If you get an error → continue below.
Step 2: Set Up Authentication (choose one)
Option A: HTTPS with Personal Access Token (PAT)
- Go to GitHub → Settings → Developer settings → Personal access tokens → Tokens (classic)
- Generate new token with at least
reposcope. - Configure credential helper:
- Push again:
- Username: your GitHub username
- Password: paste your token
Git will remember it for future pushes.
Option B: SSH Keys (recommended for long-term use)
- Generate a new SSH key:
- Start ssh-agent and add your key:
- Copy the public key:
- Add it to GitHub: Settings → SSH and GPG keys → New SSH key
- Test connection:
- Update your remote (if needed):
Step 3: Verify Setup
Try again:
- ✅ Works → you are authenticated
- ❌ Still fails → ask for assistance (common issues: token scopes, firewall/SSH restrictions)
Basic Workflow in the Terminal
1. Create a new branch
- Creates a new branch named
my-feature-branchand switches to it.
2. Verify you are on the new branch
- Output should show:
On branch my-feature-branch
3. Stage changes
- Stages all modified files (use
git add <file>to stage selectively).
4. Commit changes
- Saves a snapshot of your staged changes to the branch history.
5. Push the branch to GitHub
- Uploads your branch to the remote repository on GitHub.
Keeping Your Branch Up to Date
While you work, other contributors may push changes to the main branch.
To avoid conflicts, you should regularly sync your branch with main.
1. Switch to main and update it
2. Switch back to your feature branch
3. Merge the latest main into your branch
- If there are conflicts, Git will show them in the files.
- Resolve conflicts, then stage and commit again.
Alternative: Rebase your branch (cleaner history)
After Pushing: Create a Pull Request
- Go to your repository on GitHub.
- GitHub will suggest creating a pull request for your new branch.
- Add a description of the changes and submit the PR.
- After review, the PR can be merged into
main.
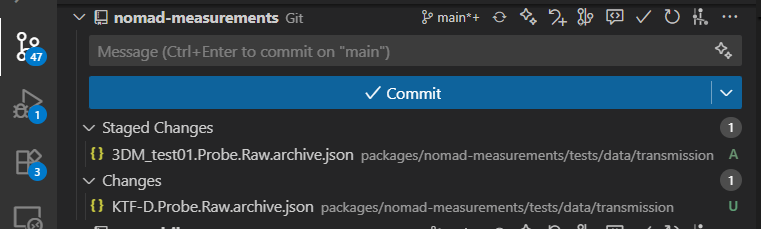
In the Source Control panel of VSCode you can do the above mentioned steps:
✅ Summary
- Always work in a separate branch
- Stage → commit → push your changes
- Open a PR to merge into
main
This workflow keeps the project history clean and enables smooth collaboration.
Git Collaboration Cheatsheet
A quick reference for the most common Git commands you will use during the workshop.
Branching & Development
| Command | Purpose |
|---|---|
git checkout -b my-feature-branch |
Create and switch to a new branch |
git status |
Show current branch and changed files |
git add . |
Stage all modified files |
git add <file> |
Stage a specific file |
git commit -m "message" |
Commit staged changes with a message |
git push origin my-feature-branch |
Push branch and commits to GitHub |
Syncing with main
| Command | Purpose |
|---|---|
git checkout main |
Switch to main branch |
git pull origin main |
Update local main with latest changes from GitHub |
git checkout my-feature-branch |
Switch back to your feature branch |
git merge main |
Merge updated main into your branch |
git pull --rebase origin main |
Alternative: rebase your branch on top of main for cleaner history |
Pull Requests
| Step | Action |
|---|---|
| 1 | Push your feature branch to GitHub (git push origin my-feature-branch) |
| 2 | Open GitHub in browser |
| 3 | Create a Pull Request (PR) into main |
| 4 | Add description and request a review |
| 5 | Merge PR once approved |
✅ Key Rules
- Never commit directly to
main— always use a feature branch. - Commit often with meaningful messages.
- Sync with
mainregularly to avoid conflicts. - Use PRs to merge changes into
mainafter review.